Air duct inspections are an important part of the air duct cleaning process. Regularly inspecting your air ducts can help ensure that your home is safe and free from potential health risks. In this article, we'll provide a step-by-step guide on how to effectively inspect your air ducts, so you can keep your home and family safe from any potential hazards. We'll cover the basics of what to look for during an air duct inspection, how to spot signs of damage or blockages, and what tools and techniques to use to get the job done. With this guide in hand, you'll be able to thoroughly inspect your air ducts and keep your home safe.
The first step in an air duct inspection
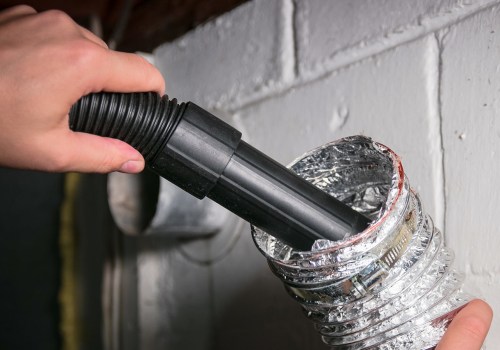
is to prepare the area.This means clearing away any furniture or other items that may be blocking the air ducts and making sure that all vents and filters are free of dust or dirt. It's also a good idea to turn off any heating or cooling systems while you're doing the inspection. Next, you'll need to inspect the air ducts themselves. Start by looking for any signs of damage, such as dents, holes, or tears in the ducts.
You should also check for any signs of mold or mildew, as these can indicate that there may be a problem with the air flow system. Pay close attention to areas where two pieces of ductwork meet, as these are often prone to leaking. Once you've finished inspecting the air ducts, it's time to move on to the filters. Make sure that all filters are clean and free of debris, and replace any that are damaged or clogged.
If you're using reusable filters, make sure to clean them according to the manufacturer's instructions. Finally, it's important to do a post-inspection check once you've finished. This should include checking all vents and filters to make sure they're in good working order, and making sure that all air ducts are properly sealed. You should also inspect any access panels or insulation around the air ducts for signs of wear or damage.
By following these steps, you can ensure that your air ducts are in good condition and running efficiently. Remember, regular inspections can help prevent problems from developing and help keep your indoor environment healthy.
Preparing the Area
Before starting the inspection, it's important to prepare the area by clearing away any furniture or other items that may be blocking the air ducts and making sure that all vents and filters are free of dust or dirt. This can be done with a vacuum cleaner, broom, or even a damp cloth. It's important to make sure that no debris is left behind that could obstruct air flow.Additionally, all air ducts should be checked for signs of mold or corrosion, as these can indicate a bigger issue. If you find any mold or corrosion, it's best to consult with a professional.
Post-Inspection Check
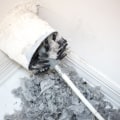
Do a post-inspection check once you've finished by checking all vents and filters to make sure they're in good working order, and making sure that all air ducts are properly sealed. You should also inspect any access panels or insulation around the air ducts for signs of wear or damage. Ensure the vents and filters are clean and free of dust, debris, and other contaminants. Also, check the insulation for signs of moisture or water damage. Be sure to repair any issues you find during the post-inspection check as soon as possible.This will help maintain the efficiency of your air duct system and keep your indoor environment healthy.
Checking Filters
When conducting an air duct inspection, it's important to check the filters. This step is critical for making sure that your air flow system is operating at peak efficiency. It's also important to ensure that the filter frames are secure and in good condition. Inspecting the filters is an important part of any air duct inspection, so it's important to take the time to do it properly. If you're not sure how to check the filters, consult a professional for advice.Inspecting Air Ducts
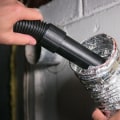
When inspecting the air ducts themselves, look for any signs of damage such as dents, holes, or tears in the ducts.Pay close attention to areas where two pieces of ductwork meet, as these are often prone to leaking. These areas should be inspected thoroughly to ensure that there are no cracks or gaps that could allow air to escape, which can cause an increase in energy costs. In addition, it’s important to pay attention to any signs of corrosion or mold growth, which can indicate a buildup of moisture. If this is present, it’s important to address the issue quickly to ensure that your indoor environment remains healthy and efficient. Finally, take note of any obstructions in the air ducts, such as debris or blockages.
These should be cleared out to ensure proper air flow and reduce the risk of potential health issues. By following these steps for an air duct inspection, you can ensure that your system is running efficiently and in good condition. Preparing the area, inspecting air ducts, checking filters, and post-inspection check are all important steps to take for an effective air duct inspection. Regular inspections can help prevent problems from developing and help keep your indoor environment healthy.